Thursday, December 18, 2014

It's the Most Wonderful Time of the Year..

Holiday Greetings!


I'm told that as you get older, things start to change. You look at things a different way, appreciate more, think a little less haphazardly. While this sage advice has only just begun to ring true for me in certain areas of my life, one area in particular proves to be a shining example of how age effects our viewpoint. Christmas. I'm sure you've heard people say jokingly (but with an air of sincerity) that as you get older, the fun of Christmas starts to dwindle away...replaced with stressful gatherings, haunting receipts of your battered bank account, and the ticking of the clock trying to squeeze everything in before Christmas. It's not that these things aren't totally true. It's just that, in a year where I feel I've grown the most, made the most progress on my personal goals, Christmas has changed for me for the better. 

Growing up, like any other kid, Christmas was it. Just the most magical time of year where I couldn't wait to open presents and get gifts for my parents and be off of school. I was rocking Christmas carols long before Thanksgiving and our tree was up immediately after turkey dinner. Every Christmas, even as young as four or five, I would cry. Why in the world? Because this time of year always just overwhelmed me with joy at how wonderful it was and also sadness knowing it was only once a year. I'd cry if my parents ran out of gifts before I did. But this year, I walk through my decorated house and notice that I don't feel the familiar surge of excitement I once got when glancing over at the tree surrounded with gifts. I'm just as likely to listen to my regular stations on the radio as I am to the Christmas playlist on my phone. And it's probably safe to say I won't be waking up at 2am this Christmas to open gifts. But does this mean the Christmas spirit has left me? Have I turned into the Grinch after all, just like everyone said would inevitably happen?

My answer is a resounding no. In fact, what I've gained this year is worth much more to me than any gift I've opened as a child. Things that I went through this year (overcoming horrible anxiety and panic disorder) have aged my inner monologue quite drastically, which in turn has changed how I feel this time of year. But instead of becoming bitter at the thought of how much money I'm spending or stressed over the amount of merry I'm supposed to making, I'm pleasantly shocked to find that I'm not missing the presents at all. Nor am I downtrodden that the daily activities of normal life are still marching on, right up to Christmas day. When I look at our tree with presents, that childlike excitement has been replaced with a warm feeling of how blessed my family is. When I'm getting ready for one of the countless gatherings I have to attend, I don't wonder what gift I'll be getting from so and so, but rather how lucky I am to have family and friends to share the holidays with. Warmer than any fire or cup of hot chocolate, the blessings that the Lord has bestowed upon me has become ever clearer, this year more than any. My age hasn't hardened me to the merriment of Christmastime, nor has it zapped me of my excitement. Rather, it has made me more aware of what I have: family, friends, food, a warm home, opportunity. To sound unapologetically corny, that is the best gift I didn't even ask for. As with many life lessons, I believe we each have to come to these realizations on our own and in our own time. You always hear "Jesus is the Reason for the Season". I know that's true, but the inevitable passing of time has been the greatest teacher in imparting that wisdom to me. Age has nothing to do with Christmas meaning less to a person. It is how you keep Christmas. And this year, I hope to keep it well past December 25th. 

Here's hoping that you have at least one person in your life that gifts you with solace and comfort, one reason to keep Christmas in a new way as you get older. Merry Christmas!

Thursday, December 11, 2014

New Mini Binder Pages: Food & Exercise Log!

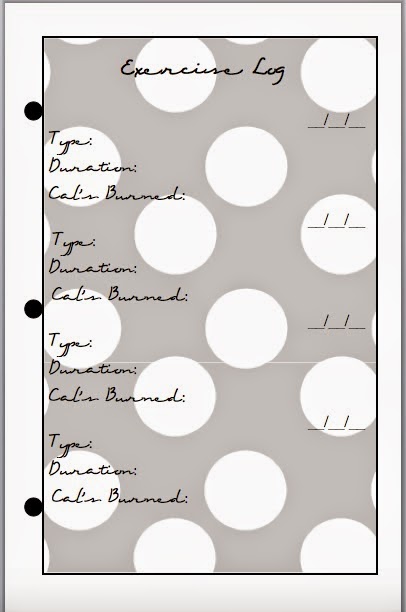
A wonderful reader emailed me asking if I have a food log designed for the mini binder (see it here and my Christmas one here if you haven't yet!) or if I could make one. Well, I hadn't thought of that so Ms. Jurlene, and everyone else, here you go! I've also made an exercise log to along with it. 

Simply click the images below for their PDF's to download and print for your mini binder!


Let me know if there's any other templates you might need for your binders!

DIY Christmas Wreath and Centerpiece Décor


This past week was an eventful one for me between getting my certification for a new job (Hello, substitute teaching!) and pulling down ALL the Christmas decorations from the attic to deck the halls. Somewhere in there, I managed to do a couple diy projects to spruce up my mother's village collection and our dining room table. 

Read on for how you can make these yourself and how Raise.com can help!

Christmas Wreath

You need: artificial poinsettias, wreath form, red ribbon, phrase plaque, hot glue gun

step 1: wrap wreath form in red ribbon. i used a straw form so i held my ribbon in place with sewing pins. the exposed portion will be covered by the flowers.

step 2: for this project, i found this wooden plaque you paint yourself (a craft within a craft! my favorite!) at goodwill but Walmart and Michael's have phrase plaques for super cheap that you can use in place. Raise.com can help you out, too! If you sign up (for free...score!) on their website, you can buy a Walmart or Michael's gift card (among many others) at a reduced price that you can use to get all the materials for this craft!

Because who else needs a reason to go shopping other than saving money!


step 3: pull your flowers and leaves from the stems.

step 4: using hot glue, attach your plaque and flowers in any orientation you like best!


step 5: i hung my wreath over my mom's Christmas village with Command strips. i'll be doing a post later on how to do the snowflakes you see on the window with just two materials!


Table Centerpiece Décor

You need: stemmed glasses, candles, small holiday trinkets, charger or decorative plate, fake snow, additional décor

the base of this centerpiece is really the overturned stemmed glasses that conceal small, holidays trinkets, topped with festive colored candles. the other items are optional but help complete the scene! I've been seeing the cutest holiday things at Target (my friend and i live there...in the dollar section) that you can snatch up for this centerpiece with a gift card from Raise.com. 

I would love to see someone do something similar with these glitter reindeer! Get them cheaper with a raise.com gift card!


step 1: gather equal numbers of stemware, candles, and small, holiday trinkets
step 2: on your charger/plate, overturn your glasses with a trinket underneath and a candle on top
step 3: add faux snow around your display (we got ours from an old pillow!)
step 4: embellish your display with any additional décor you have. we used my favorite brass deer, a festive candle snuff, and threw in a few fake poinsettias for good measure.

And there you have it! Two crazy simple Christmas decorations to get your house in the holiday spirit!


Sunday, November 16, 2014

DIY Harry Potter Ornament Series Part 4: Winged Key, Quill, Sorting Hat, Nagini, Scabbers, Sir Cadogan

Hello once again!
If you've been keeping up with the craftin', we're on part 4 of my DIY Harry Potter Ornament series! See parts 1, 2, and 3 here!

These five ornaments took me around an hour or so to make. It was very enjoyable too because they involve painting, which is always my favorite way to transform a piece into something more recognizable. Now, onto the fun stuff!

First, The Winged Silver Key from HP&SS that Harry had to catch to advance in capturing the Sorcerer's Stone.


Next, a Quill used by Hogwarts students.


As you can see, this one is hardly a craft as it's mostly done for you. But quick and easy is always a plus in my book!

The Sorting Hat we all know and love!

1. Gather a black witches hat (this felt one was $1 in the doll section at JoAnne's) and brown paints.
2. Cut a wavy, worn edge onto the brim.
3. Glue over the tip of the hat to make it worn and floppy.
4. Using hot glue, "draw" on your highlight lines where the eyes, mouth, and creases would be.
5. Paint entire hat dark brown.
6. Paint in shadows with black paint and highlights with light brown.
7. Attach hook and hang!

Nagini, Voldemort's beloved horcrux.


Again, very simple. Just painting her black designs on.

Scabbers, the untrustworthy fat rat secretkeeper. 

Much like Nagini, just paint with as much detail as you like!

And finally, Sir Cadogan in one of his paintings!

Five more ornaments down, still like thirty to go and only 38 days till Christmas! Keep an eye out for more DIY ornaments coming soon!


Tuesday, November 11, 2014

2 Ingredient Healthy FUDGY Brownies!!!

Really, I shouldn't have even put healthy in the name. Not that they aren't, but people head for the hills when they see that because it means one of two things...
1. It'll be disgusting.
2. There'll be so many ingredients to make it, it's not worth the hassle or price.

Well, ladies and gents I'm here to show you the light. 
BLACK BEAN BROWNIES.

This isn't breaking news as I'm sure you've seen a pinterest recipe for them before. But I've tried several tweaks and found the perfect way of making the best, FUDGY (yes, I said fudgy) black bean brownies!


Right, then. 
Step 1: Dig out a can of black beans I'm sure you have kickin' around your cabinets. Procure a box of your favorite brownie mix while you're at it. 
But wait! Here's the secret to the fudge: DARK chocolate brownie mix. Here I have regular Duncan Hines but if you really wanna go for it, the best I've used is Ghirardelli Dark Chocolate Brownie Mix.  What happens is the rich dark cocoa better masks the protein-y flavor of the black beans and tends to make a fudgier brownie.

Step 2: Open the can and drain and rinse your beans. REALLY WELL. Then, fill that can of beans to the top with water.

3: Put the bean/water mixture into your blender (or just pulverize by hand if you need some stress relief) and blend for about a minute until nice and smooth - no chunks of beans.

4. Dump your boxed mix into a bowl and add the bean purée. That's all you add! No butter, eggs, oil, etc. Just protein and water!

5. Stir to combine and pour into a greased baking pan. Cook brownies based on the directions right on your brownie mix box. 

So, I don't have a picture of the finished product because the whole pan was literally devoured upon escaping the oven. They're that good. I've given these to people without telling them what was in them and they've never questioned me. They love them! Some don't to be honest, as there is a different taste compared to sugary, oily brownies but it isn't a bad thing. The best part is, they're a source of fiber and protein and come in at around 160 calories per brownie! If you really wanna kick it up a notch, stir in a cup of your favorite chocolate chips/baking chips to amp up the flavor and indulgence! For the holidays, I'm thinking of adding some caramel filled Hershey's Kisses to the party! 

Oh, and here's something frightening to consider.

FORTY. THREE. DAYS. UNTIL. CHRISTMAS. 

;P

Monday, November 3, 2014

DIY Harry Potter Ornament Series Part 3: Harry's Glasses, Wizard Money, Ravenclaw Diadem, Goblet of Fire, Triwizard Cup, Extendable Ear


Well, look at that. It's November! I am so sorry for my month long hiatus. I can't even say I know where the time went. At least we gained an hour this weekend, so yay sleep! Okay, down to business people because brace yourselves...

****This is going to be a LONG post****

This series contains 6 ornaments: Harry's glasses, Wizard Money, Rowena Ravenclaw's Diadem, The Goblet of Fire, The Triwizard Cup, and an Extendable Ear.
I'll also show you how I spent my Halloween weekend!

First up, Harry's Glasses

Rowena Ravenclaw's Diadem

Wizard Money
I am aware of the $ sign and lack of insignia of the real wizard coins, however, from a distance, the colors look very similar and I get the intended purpose of wizarding money. : ) 

Triwizard Cup

Extendable Ear

Goblet of Fire


To be honest, I didn't take pictures of the hot mess process because it was really trial and error. If you want to recreate it, I used the largest plastic funnel from a 3 pk funnel set from Dollar tree for the goblet, some leftover craft foam for the stone base and fire, and brown/gray/white/black/blue paint.

DISCLAIMER: I am no artist. I'm also broke. These ornaments are of my own creation and opinion and can be rudimentary, purposely inaccurate, or works of art. Point is, I'm making them for me so use your own creativity when making your own!

Now, if you'd like to know where I spent my weekend, I'll tell you. The First Annual Harry Potter CONjuration Convention! It was a three day convention in Atlanta covering all beloved series from Harry Potter to Doctor Who to Supernatural. There were musicians, improv/magic shows, vendors, celebrity guests, and many wonderful panels about everything magic! I highly recommend going next year! Visit their website and Facebook to find out more!

My cosplay as a Deatheater :)

Stepping in as Sirius Black


Look guys, I'm on a Chocolate Frog card! One of my finest achievements! ;)

Taking a magic carpet ride

Do you recognize this lovely lady? It's none other than young Lily Potter! Miss Ellie Darcy-Alden did two Q&A panels this weekend and was kind enough to sign autographs and take pictures. She's very grounded, sweet, and funny! This picture was taken in the vendor's bazaar area.

Maybe you recognize this man, too? He's Mr. Ken Spivey of The Ken Spivey Band! He did performances and ran several of the panels at CONjuration, including one about the science in Doctor Who versus the magic in Harry Potter! Incredibly knowledgable and funny man who will be seen next at Atomacon 2014! Check him out here!

Ok, so I PROMISE it won't be as long for my next post! Feel free to leave comments on what you think of these ornaments or CONjuration! 

See the first two parts of the series here and here!


Tuesday, September 30, 2014

DIY Harry Potter Ornament Series Part 2: Neville's Remembrall & Scuttling Spiders Scene

Welcome to the second installment of my Harry Potter Ornament Series!
To see the first installment with 3 more ornaments, click here!

This week I wanted to recreate Neville's Remembrall.
1. Supplies:
- clear ornament
- red ribbon (mesh is best for the smokey effect)
- gold paint pen/sharpie
-scissors
2. Cut a piece of ribbon that's about 12 inches long.
3. Fold the end of your ribbon to thread it into the ornament. Mine pushed in easily because it was wired ribbon, but you can use a pencil if yours isn't.
4. Use your gold marker to draw details. I drew a gold band around the middle at an angle.
5. Next I drew some gold dots to resemble the real Remembrall.
6. Done!

Scuttling Spiders Scene
I really got the inspiration for this ornament when I saw this pack of little spiders at Dollar Tree. Seriously, people that store is the shiz. You remember in Chamber of Secrets where the spiders run across the hall and out of the window? That's the scene I wanted to recreate. This is a long tutorial so forgive me.

1. Not pictured: cardboard, excato knife, hot glue gun
2. Draw a Hogwarts style window on your cardboard.
 3. Cut out with exacto knife.
 4. Brace cardboard by glueing on craft sticks.
5. Print picture of Forbidden Forest and cut to size.
6. Paint window with layers and foam to resemble stone.
 
7. Lay craft sticks in a tight row to form a "floor". Brace by glueing on two support sticks.
8. Flip over and use hot glue gun to draw on a brick/stone pattern.
9. Layer paint colors to resemble a stone floor.
10. Glue your picture to the back of the window.
11. Attach floor to window with hot glue and craft sticks for support. Glue on spiders to look like they're fleeing to the forest. Voila!

I hope you enjoy! Check out the first installment here!